Forums (I/O Tower)
Forums 
  General Discussion 
 TRON: Legacy Lightcycle Baton kit build.


New New Comments | Post No Change | Locked Closed
AuthorComments:  Page: of 1 Page
BanditTron
User

Posts: 402
TRON: Legacy Lightcycle Baton kit build.

on Saturday, June, 08, 2013 11:28 AM
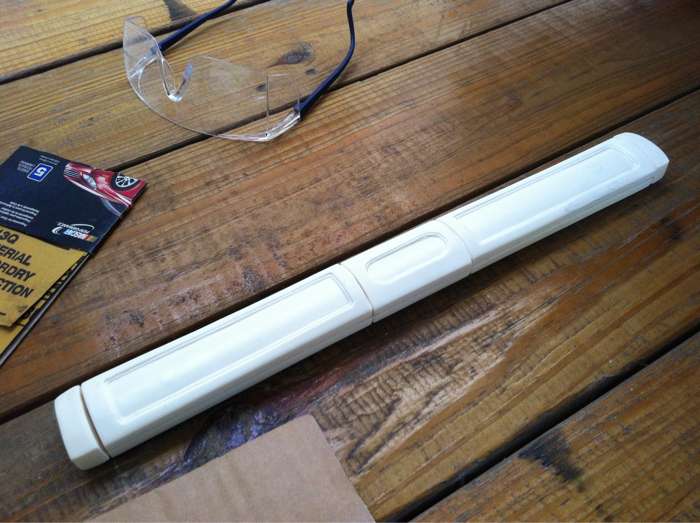
I acquired this kit from a member of the RPF who did a small run. I got two kits, one is full resin with no electronics and the other is resin with transparent end caps and electronic for full lighting.

The first kit I am working on is full resin.
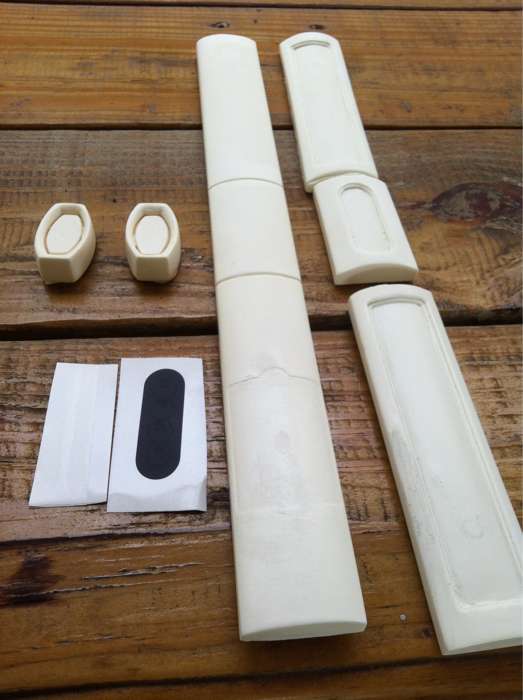
-Full bottom piece (untrimmed)
-2 Top Hand Grip pieces (untrimmed)
-1 Top Center Control piece (untrimmed)
-End caps Non-transparent resin (untrimmed)
-Decal sheet
-Decal transfer sheet


My goal with this kit is to make it a costume prop that I can wear on my leg while attached with magnets.

Agenda-Remove excess resin from casting process
-smooth out edges for fitment
-hollow out the inside of the body for lighter weight and magnet storage

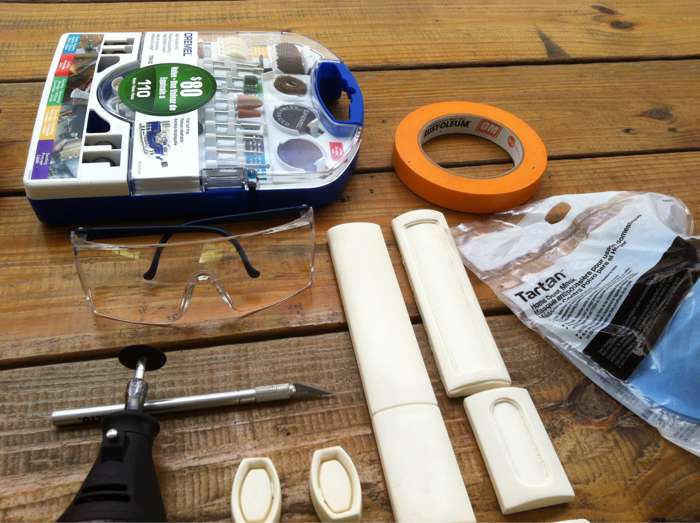
Beginning by gathering necessary materials.
Needed various Dremel components so I got an accessory kit for under $20. Also needed Glue (Go2 glue), masking tape, safety glasses, filter masks, hobby knife and Dremel.

This is the first resin prop kit that I've ever worked with so I was unsure of how to go about removing the excess with the Dremel and what attachments to use, so there was some trial and error.

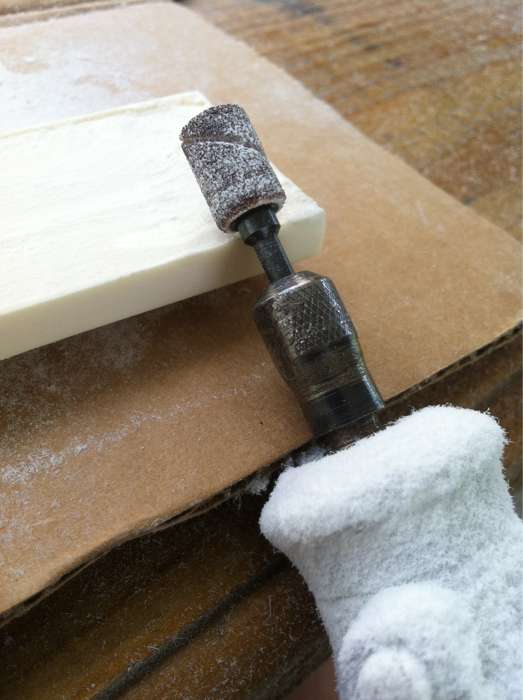
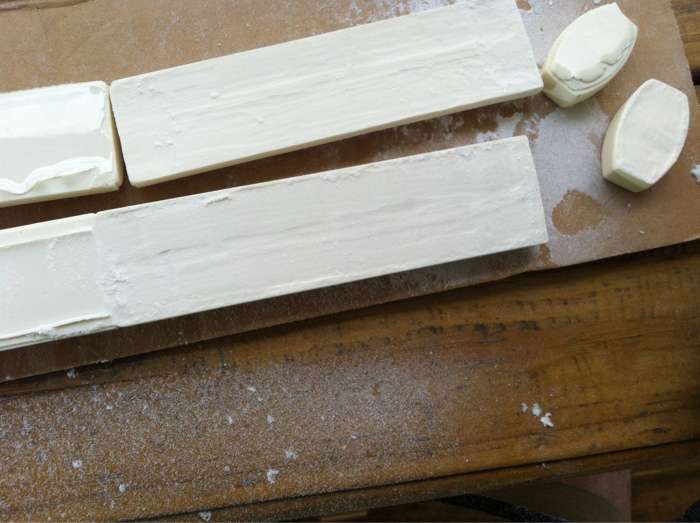
So I started out by using a Sanding bit to remove the excess resin. This was a good way to remove the little amount but I had to make sure to stay away from the hard edge of the piece as to not ruin it by causing a uneven line.

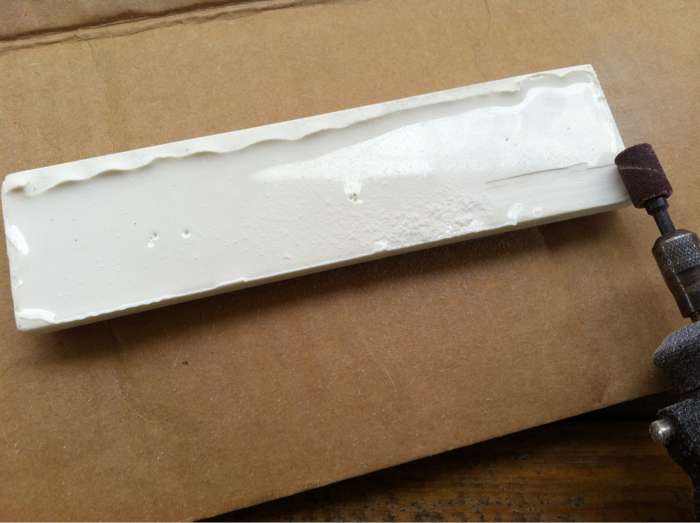
The way I stayed away from the hard edge was to angle the Dremel and use the corner of the sanding bit to stay towards the inside of the piece removing just the unnecessary material.

Here you can see the excess material removed from one of the Top grips and part of the bottom piece as well as one of the endcaps.

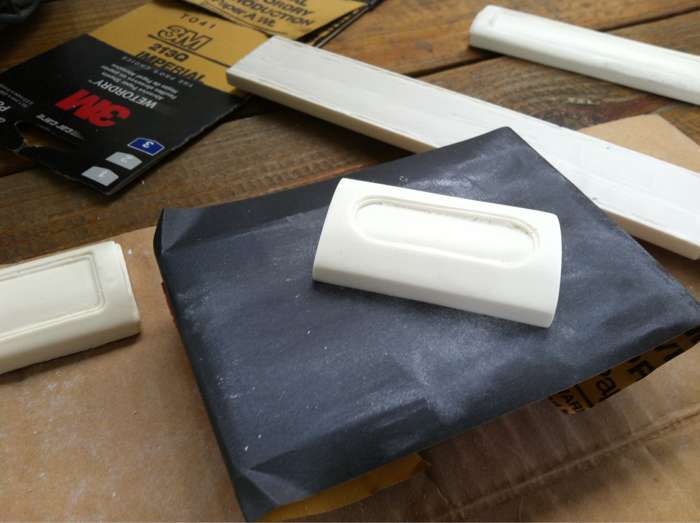
Once all the pieces had the excess removed I went about smoothing them out a bit more to get a nice flush fit to the top and bottom pieces. I grabbed some sandpaper (1000 grit) and a sanding block that you can see here

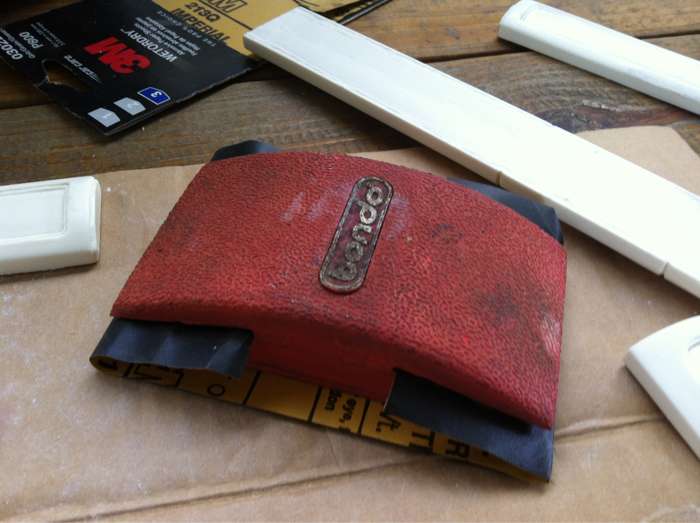
Mostly what I did was to just move the piece over the sand paper a few passes at a time and then check fitment against the other piece by looking to see if there was a noticeable gap. The more you work the piece the more you should see the gap diminish.

Once I got the fitment to a degree I was satisfied with I then went on to hollowing out the pieces for weight saving. One thing I decided to do was to hollow out one end of the baton more than the other. My reasoning for that was so that one end of the baton would always want to stay pointing towards the ground if I was wearing it on my leg.
The only way I could figure out to hollow these pieces and to do so in a short time is to use a cutting wheel. Cut the outer edge of the "box" area and then make vertical and horizontal lines throughout the box which makes it easier to remove smaller bits of material than larger chunks.
Be very aware of the depth that you use the cutting wheel and take your time with the passes. I was constantly worried I was going to cut through the other side but since I took my time and kept checking all the pieces came out fine.
This is the baton with the pieces just sitting together, nothing is permanently attached yet.

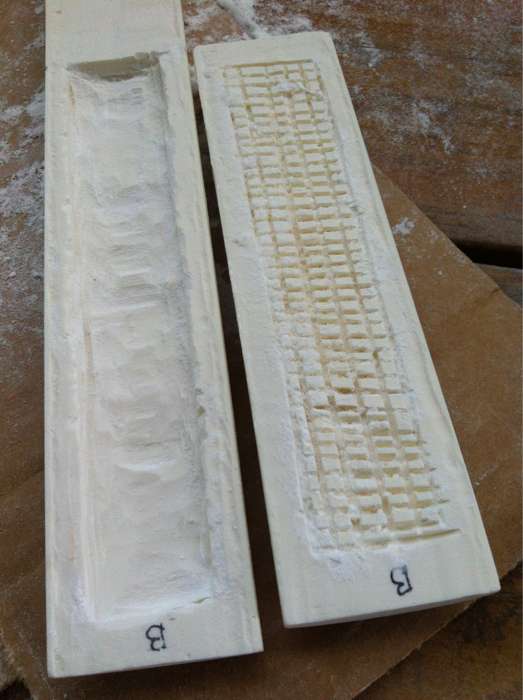
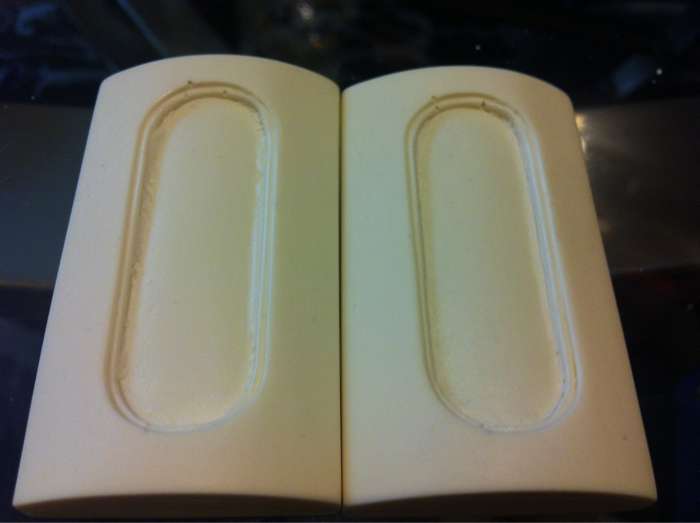
Next, I wanted to clean up some areas of the molded pieces that were rough. I didn't have any specialized tools to use so I just used a xacto knife to scratch away at the small bits of excess in the ridge areas.
Here you can see the differnce along the "stepped" areas with an untouched piece (left) and the cleaned up piece (right).

Now for the magnets! Went to the local hobby store and found the perfect sized magnet that I wanted to use to attach to my pants leg.
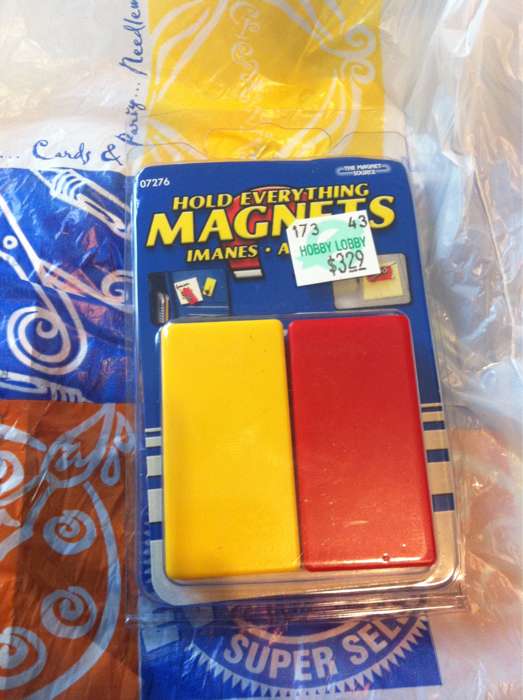
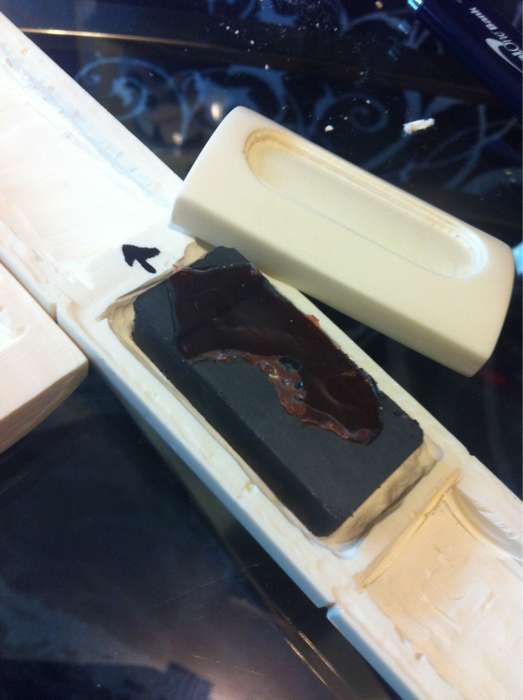
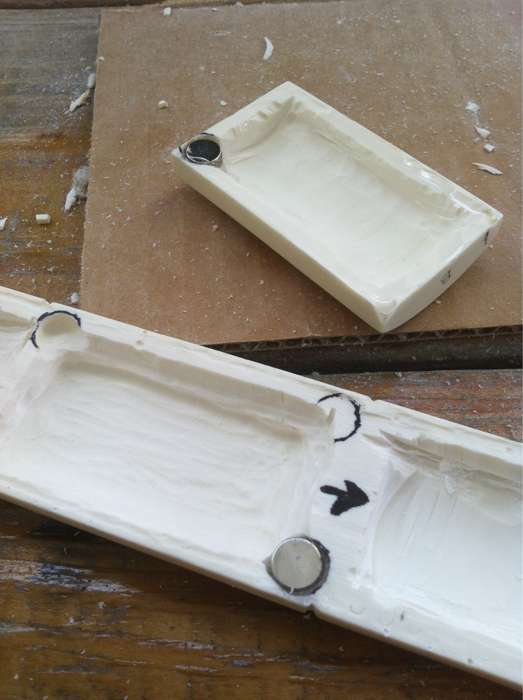
I had to remove the colored plastic cover by using a flat head screwdriver which was easy enough then I checked the fitment of the magnet into the center of the body. (after fitting I knew I had to remove more material and I wanted to get the bottom as thinned out as possible to let the magnetic contact be the strongest) The arrow is pointing to the end of the baton I want to point up that has less material. I also drew an arrow on the magnet after checking the polarity against the magnet already attached to the pants.

More magnet fun!
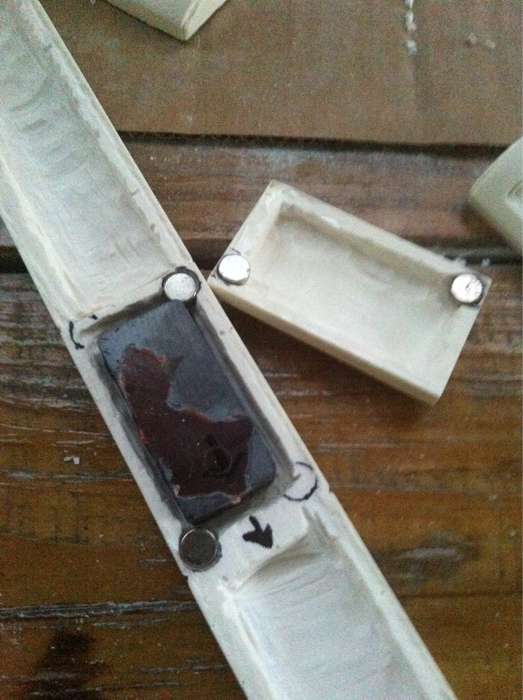
Initially I was just going to seal the center piece permanently with glue but decided to test out magnetic closure that I planned for the other kit. So I measured out from the hard edge on all pieces where I needed the neodymium magnets to go while allowing room in the center for the leg magnet. Once I measured it and had the circumference drawn out I removed the excess material using a engraving bit. I did a little at a time and then would check fitment of the magnet until I could get the surface even to or just below the edge.

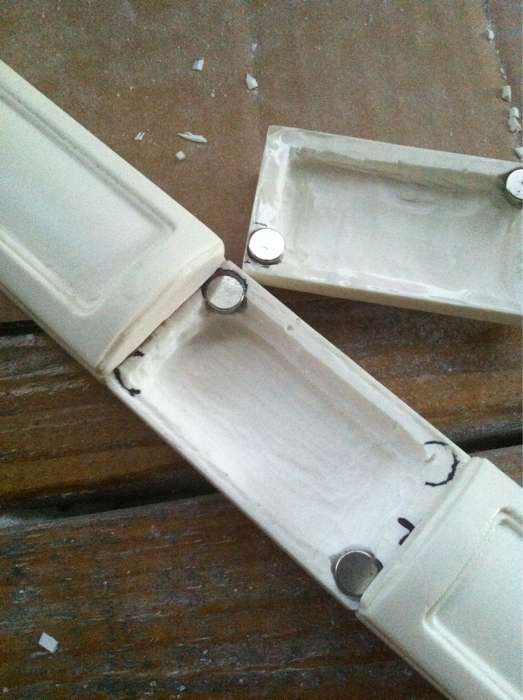
I had thought that I would put a magnet at each corner but after testing only two magnets in opposite corners I knew they would be enough. Also here I was checking clearance on the "leg attachment" magnet.

For final fitment before I glued the Top Grip pieces on to the Bottom piece I made sure to keep the Top Control Center piece on to make sure there would be enough area for the center to be taken off and on and keep the gaps to a minimum.

So I added some glue to the Top Grip areas and instead of using clamps I wanted something that would give pressure from every possible direction and the simple solution was rubberbands. wrapped it and let it dry and cure for 24 hours

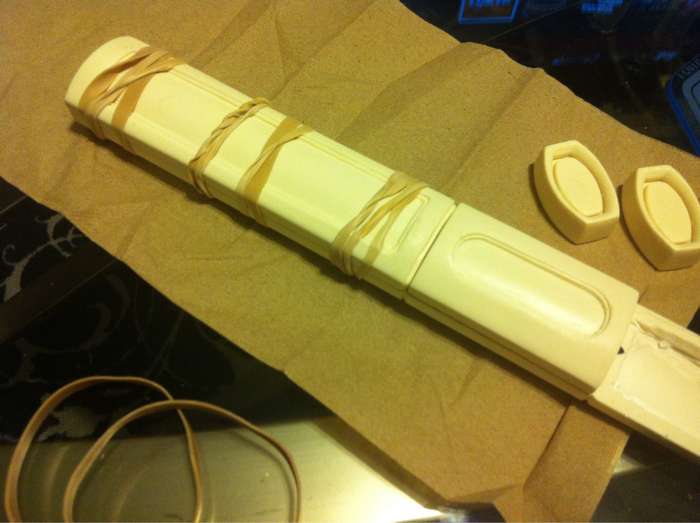
As of right now this is how is stands. Ready for primer and sanding next.
order abortion pill http://unclejohnsprojects.com/template/default.aspx?morning-after-pill-price where to buy abortion pill


BanditTron
User

Posts: 402
RE: TRON: Legacy Lightcycle Baton kit build.

on Saturday, June, 08, 2013 3:24 PM
All the above progress had been done over the course of the past two weeks.
The past couple of days including today I have got a bit more done

June 7, 2013
Worked a little on the endcaps. There was a small raised spot in the recess (as seen on the left one) that I removed by using the tip of my hobby knife to slowly scrape it away and the one on the right is the result.


Also, I primered the baton and then sanded. Once that was done I filled in some of the mold lines along the sides with model putty. The sanded the putty down and hit those edges with primer which then was sanded one last time using various grits of 800, 1500 and 2000.

Then I finally started on the paint. Decided to do the recessed grip on both sides in a Flat Black. I noticed this on one of the D23 baton's that the grip looked like a Flat Dark Grey or Black in the photo. I went with Black since I did the same scheme on my scratch build baton and liked it.

June 8, 2013
after I let the Flat Black cure I got the recessed grips masked off as well as the bottom half of the center control box. Also, figured that since the Control Box will have the ability to open that I should "Tron-ify" the attachment magnet. I used some small strips of reflective tape to make the circuits on the magnet.

I just finished painting the main body using "Blazing Black" metallic lacquer. I'll wait for that to dry then paint the bottom of the Control Box along with the Top piece and the End caps. Its almost complete.order abortion pill abortion pill buy online where to buy abortion pill


HooDooMan
User

Posts: 585
RE: TRON: Legacy Lightcycle Baton kit build.

on Saturday, June, 08, 2013 5:54 PM
Dude, that's lookin' awesome!! I can't wait to see it all finished up!


ShadowSpark
User

Posts: 2,943
RE: TRON: Legacy Lightcycle Baton kit build.

on Saturday, June, 08, 2013 10:51 PM
Are those kits being sold? Where can I get one?on line abortion pill misoprostol dose abortion medical abortion pill onlineabortion pills online abortion pill online purchase cytotec abortion


{A very big thanks to FlynnOne for the pic! And to Wulfeous for sharpening the details!*huggles both*}
{Because people always seem to guess wrong, I'm saying it here: I'm female!!! And my name is Spark!!!}

Tron Lives!

Please click here to help my family out.
 
Kat
User

Posts: 2,394
RE: TRON: Legacy Lightcycle Baton kit build.

on Saturday, June, 08, 2013 11:46 PM
Looking great so far! Can't wait to see it done, and to see the other one as well!

What do you want? I'm busy.


Program, please!


Chaos.... good news.
 
BanditTron
User

Posts: 402
RE: TRON: Legacy Lightcycle Baton kit build.

on Sunday, June, 09, 2013 12:09 AM
Thanks everyone, I'm enjoying building it!

The kits are not being sold right now, the initial run on them is closed. They were done by RPF member ArtFunk who was famous for his screen accurate Rinzler Helmet replica among other things.

He might do more down the road, but I don't know. Here is the link to the original thread:
http://www.therpf.com/f9/tron-legacy-lightcycle-baton-173929/where to buy abortion pill ordering abortion pills to be shipped to house buy abortion pill online


BanditTron
User

Posts: 402
RE: TRON: Legacy Lightcycle Baton kit build.

on Tuesday, June, 11, 2013 5:53 PM
More progress today since I had a busy weekend and couldn't get around to it. But anyways...

The "Blazing Black" went on very well and I let it cure for a few days since I put on so many coats. I then masked it off to protect it from any overspray from the "Graphite Dust" that im using as the color for the Center Control Box and the End Caps.


and BAM...after three coats of the "Graphite Dust" lacquer this is how it sits for the next couple days to fully dry.


Getting near the final steps. Just have to attach the End Caps to the main body and to any touch up work. Then I apply the decals and cut a "control panel" cover from some clear acrylic I have. More soon!


BanditTron
User

Posts: 402
RE: TRON: Legacy Lightcycle Baton kit build.

on Friday, June, 14, 2013 9:19 PM
Final update on my Kit #1 build
Endcaps painted and ready to go on. A step I forgot to mention when I painted the main body and endcaps was to mask off the "attaching" surface of each to allow for whatever adhesive is used to adhere the best. This pic shows the bare resin that was covered with the masking.

So I glued on the End Caps and let that set for 24 hours before the next step, which would end up being the last step with many little steps as a part of it.
The first being the reflective backing for the Control Panel label. I used the method of a piece of paper placed over the label then traced the outline with a pen. After that just a matter of laying the paper over the reflective tape and tracing the pen along the black line on the paper to make an impression on the tape. That way I just used scissors to cut along the impression to get the same size as the label.

Then layed down the clear transfer tape across the black label (I opted not to remove the parts of the black decal that were supposed to be removed before putting the transfer tape on, but it can be done either way) and removed the black label and transfer tape from the decal backer.


Then I just layed the decal down onto the reflective side of the piece I cut earlier. It made the entire decal easier to handle. Removed the Transfer tape and then bent the decal to raised the edges along the cuts to remove the parts of the decal that were not needed. I used the tip of an Xacto knife to help raise the tiny edges. Once that was done, it was ready to lay down!

The Finished "Stunt" Baton


Control Panel removed with internal magnet
order abortion pill abortion pill buy online where to buy abortion pillwhere to buy abortion pill http://blog.bitimpulse.com/template/default.aspx?abortion-types buy abortion pill online


HooDooMan
User

Posts: 585
RE: TRON: Legacy Lightcycle Baton kit build.

on Friday, June, 14, 2013 9:34 PM
DUDE!! That looks AWESOME!!

So how does it work with the outfit? Have you tried it yet?order abortion pill morning after pill price where to buy abortion pill


BanditTron
User

Posts: 402
RE: TRON: Legacy Lightcycle Baton kit build.

on Friday, June, 14, 2013 10:22 PM
Thanks HooDooMan!

ummm..no, why would I try i......YES, of course I did ahahh

It does attach to the pant leg fine but I do not think I would wear it to walk around with since it is still just too darn heavy. I'd probably end up using this one for posed photo shoots and the paper prop one for wearing around cons and other costume events.

Now to motivate myself to do the lighted version kit I have sitting on my coffee table! hahaon line abortion pill misoprostol dose abortion medical abortion pill onlineabortion pills online abortion questions cytotec abortion


Kat
User

Posts: 2,394
RE: TRON: Legacy Lightcycle Baton kit build.

on Friday, June, 14, 2013 11:00 PM
Oh, neato!

What do you want? I'm busy.


Program, please!


Chaos.... good news.
 
BanditTron
User

Posts: 402
RE: TRON: Legacy Lightcycle Baton kit build.

on Saturday, June, 15, 2013 12:00 PM
Kat Wrote:Oh, neato!

Thank you, Kat!

I have been wanting a decent replica of the Baton since the film was released and I'm happy now to have that as well as knowing that I constructed it the way I saw it. Created a very satisfying feeling for this Program!


A couple more pics along with a size comparison with the SpinMasters toy version of the Baton, which is near the same length but noticeably larger in every other aspect.


Falty
User

Posts: 160
RE: TRON: Legacy Lightcycle Baton kit build.

on Wednesday, June, 26, 2013 2:12 AM
that looks SEXY! Would be like a cherry on top if they halves came apart as if to form the lightcycle or jet where to buy abortion pill http://blog.bitimpulse.com/template/default.aspx?abortion-types buy abortion pill online


BanditTron
User

Posts: 402
RE: TRON: Legacy Lightcycle Baton kit build.

on Monday, July, 01, 2013 4:53 PM
Falty Wrote:that looks SEXY! Would be like a cherry on top if they halves came apart as if to form the lightcycle or jet

The guy who sculpted the baton actually wanted to incorporate a bar (much like the toy version) that would allow the grips to be pulled outward away from the control box, but it wouldn't work and still be able to have the electronics inside to light it up.

here's the pic of the acrylic slide that he was going to use


Also...gettting much closer to having the Electronic Baton ready. Just a couple more coats of paint on the Control Box.order abortion pill abortion pill buy online where to buy abortion pill


 Page: of 1 Page
New New Comments | Post No Change | Locked Closed
Forums 
  General Discussion 
 TRON: Legacy Lightcycle Baton kit build.